My documents
Upload the supporting documents carriers require just once, and reuse them for all your number orders.
At a glance
| Where | Numbers menu, My documents entry |
| What the screen lets you do | upload, view and delete the supporting documents that can be attached to an order |
| Who has access | the account administrator: "They are encrypted and only the account administrator has access to them." |
| Accepted formats | PDF, JPEG or PNG |
| Maximum size | 10 MB per file |
| Format check | on the file's content, not its extension |
| Duplicate | a file already present on the account is rejected |
| Types offered | 13, split into three families: Personal identity, Company identity, Proof of address |
| A document attached to an order | cannot be deleted |
How it works
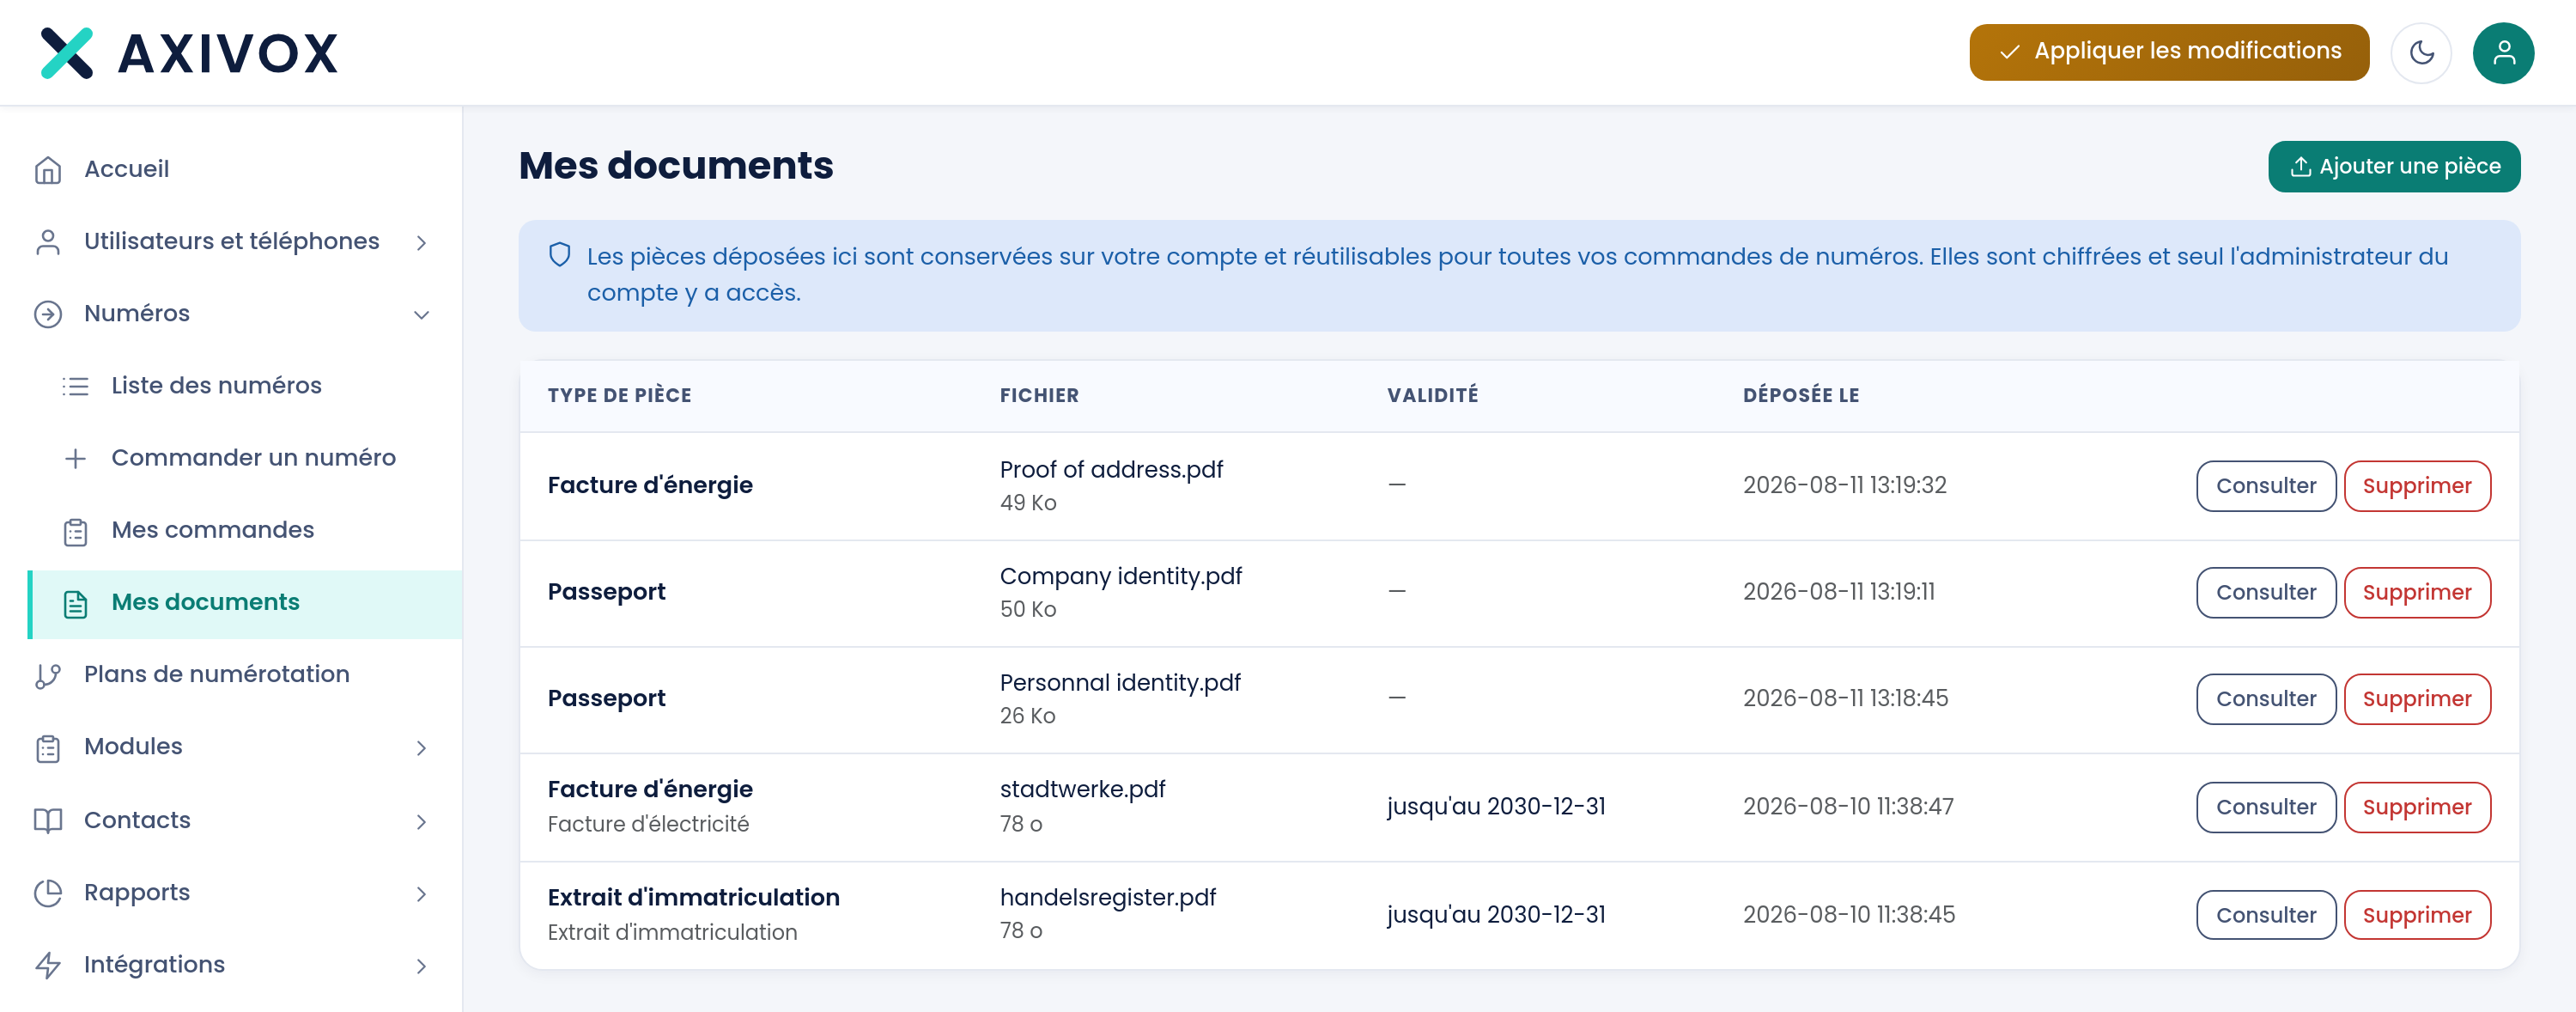
The screen opens with what it does and what it guarantees: "Documents uploaded here are kept on your account and reusable for all your number orders. They are encrypted and only the account administrator has access to them."
The Add a document button unfolds a form. You choose the Document type, give it a Title, select the File, and can optionally fill in two dates, Issued on and Valid until. The Upload button completes it.
The list then fits into a table: the type and title, the file name and its size, the Validity, the upload date. An expired document is shown in red with the expired label. A document already in use carries the number of orders relying on it, and its Delete button is disabled.
The View button opens a preview within the page, with a Download button at the bottom of the window.
The thirteen types offered are: Certificate of incorporation, Trade register extract, Driving licence, ID card, Passport, Phone bill, Rent receipt, Residence permit, Document attesting the authorised signatory, Business licence, Energy bill, Visa, Other.
What to enter
| Field | What's expected | If you leave it blank |
|---|---|---|
| Document type | the actual type of the document uploaded | the first type in the list stays selected, which will misclassify the document |
| Title | something to recognise it by in the list, "E.g.: manager's passport" | the document is then only identified by its type and file name |
| File | PDF, JPEG or PNG, 10 MB maximum | the Upload button stays inactive |
| Issued on | the document's issue date, Optional | nothing blocking |
| Valid until | the document's expiry date, Optional | the Validity column stays blank and the document will never be flagged as expired |
Steps to follow
- Open the Numbers menu, then My documents.
- Click Add a document.
- Choose the Document type that actually matches the document, not just the first one available.
- Give it a meaningful Title: it's what you'll read again in six months' time.
- Select the File. The form only accepts PDF, JPEG and PNG files up to 10 MB.
- Fill in Valid until as soon as the document carries an expiry date, if only to be warned in time.
- Click Upload. The message "Document saved." confirms it, and the document appears in the list.
- Click View to check the file is readable and complete, pages included.
If it doesn't work
"Format not accepted: only PDF, JPEG and PNG are allowed." The portal looks at the file's content, not its extension. Renaming a file to .pdf changes nothing, then. Open the document and re-export it as PDF, or photograph it as JPEG.
"The file exceeds 10 MB." A very high-resolution scan quickly passes the limit. Rescan at 200 dots per inch, or re-export the PDF at reduced quality. A supporting document stays perfectly readable well under 10 MB.
"This document is already present on your account." The portal computes a fingerprint for each file and rejects duplicates. The document is already in the list: find it and attach that one to your order.
"This document is attached to an order in progress: it cannot be deleted." A document that a pending order relies on can't be removed. The number of orders concerned is shown on the row. Detach the document first from My orders, or wait for the order to complete.
"This format can't be displayed here. Use the download option." The in-page preview can only show images and PDFs. Click Download at the bottom of the window to open the file with your own software.